If you’re getting ready to move abroad, one of the first hurdles you hit is paperwork. And not just “a few forms,” but a messy combination of:
- identity documents
- financial proof
- background checks
- translations
- medical records
- random documents you didn’t know existed yesterday
Everyone tells you to “stay organized,” but no one explains what that actually means. You look at the list and wonder: Where do I start? What do I need? What happens if I forget something? This guide is here to calm all of that.
By the end, you’ll understand exactly how to organize immigration paperwork, what documents really matter, how to avoid last-minute surprises, and how to manage everything in a way that keeps your move abroad smooth instead of chaotic.
Table of Contents
1. Start With One Simple Folder Structure
Before you dive into collecting anything, you need a clean structure. Most stress comes from documents scattered across emails, downloads, WhatsApp, cloud drives, old laptops, and random screenshots.
Instead, create one system that everything flows into.
Create a single main folder called: “Immigration – COUNTRY NAME”
Inside it, add:
- 01 – Identity & Passports
- 02 – Financial Proof
- 03 – Employment or Study Documents
- 04 – Housing & Accommodation
- 05 – Health & Insurance
- 06 – Police Certificates
- 07 – Translations & Apostilles
- 08 – Application Forms & Receipts
- 09 – Appointments & Confirmation Emails
- 10 – Copies & Backups
Keep the naming simple and intuitive.
Why this matters
Your brain will stop carrying the load. Everything has a home. When you need something, you’ll know exactly where to look.
2. Gather Your Identity Documents First (Everything Else Depends on These)
Every immigration process starts with identity verification. To organize immigration paperwork effectively, begin here because most other steps require these documents as attachments or in-person proofs.
Collect:
- Valid passport (check expiration — many countries require 6–12 months validity)
- Birth certificate (long-form, if applicable)
- National ID card
- Proof of name changes (if any)
Scan everything at high resolution (300dpi) and save as both PDF and image (JPEG/PNG).
Proof tip:
Email the scans to yourself as well — this gives you an automatic cloud backup.
For passport validity guidelines, link to IATA travel regulations: https://www.iatatravelcentre.com
3. Financial Proof: What Immigration Offices Actually Want
This is one of the trickiest parts because requirements vary by country.
Most countries ask for:
- Recent bank statements
- Savings balance
- Income proof or employment contract
- Tax returns (sometimes)
- Pay slips (usually 3–6 months)
How to organize financial documents clearly:
Create subfolders such as:
- Bank Statements
- Payslips
- Tax Returns
- Employer Letters
- Savings Proof
Rename everything with a clean structure:
BankStatement_NAME_Bank_Jan2025.pdf
Payslip_CompanyName_March.pdf
Clean naming = fewer mistakes.
4. Employment, Study, or Purpose-of-Stay Documents
This is where requirements depend heavily on your visa type.
If you’re moving for work:
You may need:
- Work contract
- Offer letter
- Sponsorship letter (if required)
- Company registration documents
If you’re moving for study:
Gather:
- University acceptance letter
- Enrollment confirmation
- Tuition payment proof
- Accommodation confirmation (if student housing is required)
If you’re moving for lifestyle visas (digital nomad, freelancer, family, retirement, etc.):
Common requirements include:
- Proof of remote work or self-employment
- Portfolio or client contracts
- Pension statements
- Marriage/birth certificates (for dependents)
Sort these documents into your “03 – Employment or Study” folder.
5. Housing Documents (Even If Temporary)
Many countries require proof of where you’re staying.
Acceptable documents may include:
- Lease agreement
- Hotel booking (short-term)
- Airbnb confirmation
- Invitation letter from a host
- Proof of address registration (if done post-arrival)
Best practice:
Save both the PDF and the email confirmation. Immigration officers often compare the two.
6. Health, Insurance, and Medical Records
Many countries want to see proof that you won’t be a financial burden on the healthcare system.
Gather:
- Health insurance certificate
- Policy summary (PDF version)
- Vaccination documents (as required)
- Medical test results (if part of the visa process)
Some countries require a specific format for medical exams—make sure your clinic knows the exact visa type.
Read Also: Living Abroad: 10 Powerful Secrets to Building an Amazing Life Overseas
7. Background Checks & Police Certificates
This is where delays often happen.
Police certificates may take:
- 24 hours in some countries
- 2–12 weeks in others
- Even longer if fingerprints are required
Order your police certificates early, then scan and store:
- The original PDF
- Any stamps, apostilles, or authentication pages
- Translations (if needed)
8. Translations, Apostilles, and Notarizations
If your documents are in a language not accepted by your destination country, you’ll need:
- certified translations
- notarized copies
- apostille authentication (for many official documents)
Organize immigration paperwork here by sorting into subfolders:
- “Translations”
- “Apostilles”
- “Notarizations”
Tip:
Keep both the original and translated versions together in one combined PDF.
External resource suggestion:
For apostille information, link to The Hague Conference website: https://www.hcch.net/en/instruments/conventions/specialised-sections/apostille
9. Make a Master Immigration Checklist
This is the part most people skip — but it makes everything easier.
A good checklist includes:
- Each required document
- Status (Not started / In progress / Completed)
- Whether it needs translation or apostille
- Whether you need physical prints
- Appointment dates
- Submission deadlines
If you organize immigration paperwork with a checklist, you dramatically reduce errors and stress.
10. Prepare Multiple Copies (Digital + Physical)
For every document:
- Keep a digital version
- Keep a printed version
- Keep at least one extra copy in case an officer requests it
Many immigration offices still prefer hard copies, even in 2025 and beyond.
11. Track Expiration Dates and Renewal Cycles
This is where people get caught off guard.
Documents with expiration dates include:
- Passports
- Residence permits
- Visas
- Health insurance
- Lease contracts
- Temporary registration papers
- Police clearances (validity varies 3–6 months)
Create an “expiration calendar” listing:
- What expires
- When it expires
- When you need to renew
- What the renewal requires
Otherwise you risk scrambling at the last minute.
12. Back Everything Up (In Three Places)
To organize immigration paperwork safely:
- Your main folder (local storage)
- Cloud backup (Google Drive / iCloud / Dropbox)
- Email backup (send documents to yourself)
If one device fails — you’re still safe.
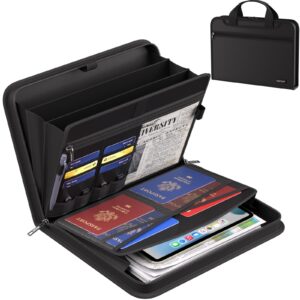
13. Bring Physical Copies in a Simple Folder
For in-person appointments, prepare a physical folder with:
- Originals
- Copies
- Passports
- Appointment confirmation
- Pen + small notepad
Immigration offices appreciate structure. It signals that you’re prepared and cooperative, which often makes the workflow smoother.
14. Keep a “Notes” File for Every Appointment or Call
Whenever you speak to an embassy, immigration office, or service provider:
- Record the date
- Who you spoke to
- What they said
- Any new requirements
This prevents miscommunication and protects you if instructions change (which they often do).
15. The Calm Approach: One Step at a Time
Organizing immigration paperwork is not about speed. It’s about clarity.
Break everything down into small, manageable pieces.
You don’t need to do it all at once.
But you do need a system that holds everything together.
Final Thoughts… And How Aqee Helps You
Organizing immigration paperwork is one of the biggest hidden challenges of moving abroad. It’s not glamorous, but it’s essential — and doing it well makes everything else faster, easier, and much less stressful.
To help with this part of the journey, we built Aqee, a tool designed to keep your documents, deadlines, renewals, checklists and tasks in one calm space. Instead of juggling files across email, cloud folders, screenshots and random notes, you get:
- one place to store and find every important document
- smart reminders when something is about to expire
- a clear path for your residency or long-term goal
- gentle quests that help you settle into your new city and feel at home
The paperwork gets organised. The overwhelm gets lighter. And the move abroad becomes something you can actually enjoy.
If you want to simplify your relocation, keep everything neat, and feel supported from landing to settling in, Aqee is built exactly for that.